Introduction
When working with LED strips, one of the most common challenges is reconnecting them without soldering. Soldering can be messy, time-consuming, and requires specific skills. Additionally, it can potentially damage your LED strips if not done carefully. Thankfully, there’s a simple solution: LED strip connectors. These connectors allow you to join your LED strips quickly, safely, and without the need for soldering.
In this article, we’ll delve into how you can easily reconnect your LED strips using connectors. Whether you’re a DIY enthusiast or a professional, understanding the types of connectors available and how to use them will help you streamline your projects and avoid unnecessary complications.
Why Avoid Soldering?
The Drawbacks of Soldering LED Strips
While soldering is a common method for reconnecting LED strips, it’s not always the best option. Soldering requires specific tools and technical know-how, which can be a barrier for many users. Here are some drawbacks to consider:
- Time-Consuming and Requires Skill: Soldering involves heating the metal and attaching the wires manually, which can take time and practice.
- Risk of Damaging the LED Strip or Circuit: Improper soldering can lead to damage, such as burning the LED strip or causing short circuits.
- Messy and Potentially Unsafe: Soldering creates smoke and involves using high heat, which can be hazardous if not done carefully.
For these reasons, many people opt for an easier and safer method – using LED strip connectors.
Advantages of Using Connectors
LED strip connectors offer several benefits over soldering:
- Quick and Easy: Connecting your LED strips using connectors is much faster and more convenient. There’s no need for heating tools or special training.
- No Special Tools Required: Unlike soldering, which needs a soldering iron and flux, connectors just require you to plug in the strip.
- Clean and Safe: Using connectors eliminates the risk of damaging the strip or creating a fire hazard, making them a safer and cleaner alternative.
If you’re looking for a more efficient and reliable way to work with LED strips, LED strip connectors are your best option.
Types of LED Strip Connectors
There are several types of LED strip connectors available, each designed for different applications and preferences. Here’s an overview of the most common options:
Clip-on Connectors
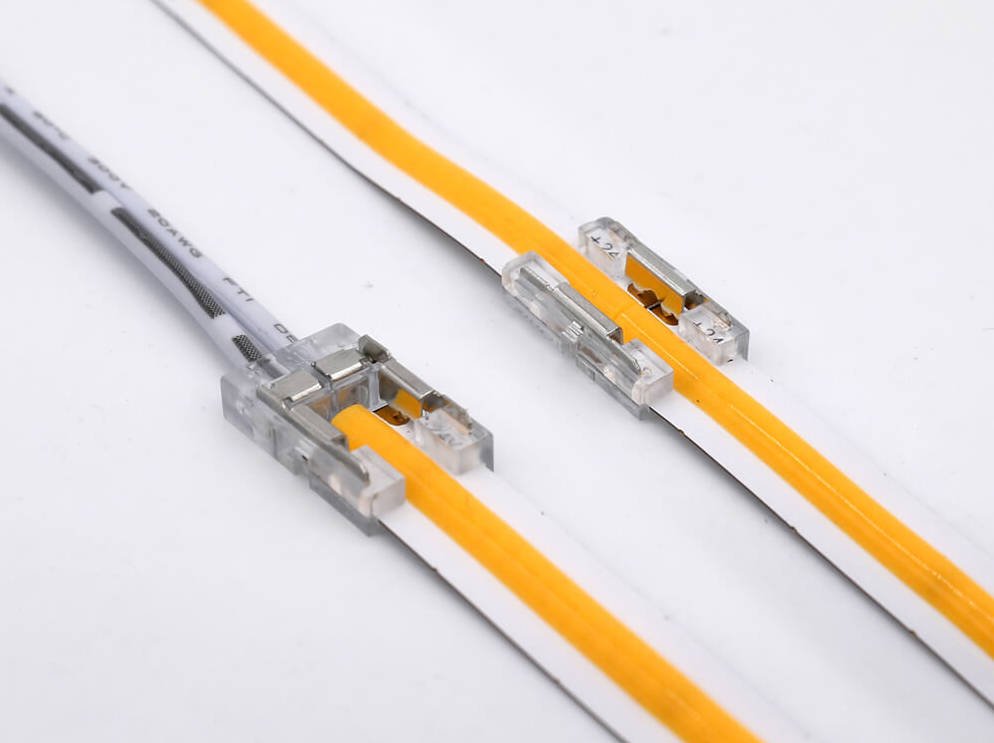
Overview: Clip-on connectors are simple devices that allow you to attach your LED strips without the need for any soldering or tools. These connectors clip onto the copper pads on your LED strip.
Best For: Standard 10mm or 8mm width strips.
Advantages:
- Easy to use with no tools required.
- Fast installation and disconnection.
When to Use: Clip-on connectors are ideal for quick installations, temporary setups, or when you need to easily disconnect the LED strips in the future.
Pin Connectors
Overview: Pin connectors feature small metal pins that push through the copper pads of your LED strip. These connectors provide a secure and reliable connection.
Best For: Smaller, high-density LED strips that require a more precise connection.
Advantages:
- Firm and stable connection.
- Provides a more secure hold than clip-on connectors.
When to Use: Pin connectors are perfect when you need a more permanent connection or when working with high-density LED strips.
Push-in Connectors
Overview: Push-in connectors allow you to insert the LED strip directly into the connector without the need for screws or additional tools.
Best For: LED strips that are 10mm wide or larger.
Advantages:
- Fast and easy to use.
- Provides a solid and secure connection.
When to Use: These connectors are suitable for permanent installations or when you need a reliable, long-lasting connection.
How to Use LED Strip Connectors
Once you’ve chosen the right LED strip connector, the next step is to use it effectively. Here’s a simple, step-by-step guide to ensure a proper connection:
Step-by-Step Guide
Step 1: Prepare the LED Strip
Before attaching the connector, it’s important to clean the copper pads on your LED strip. Use a clean cloth to remove any dirt or residue. This ensures a good electrical contact between the strip and the connector.
Step 2: Choose the Right Connector
Ensure that the connector you select is compatible with your LED strip in terms of width, type, and voltage. Some connectors are designed specifically for 8mm strips, while others are for 10mm or wider strips.
Step 3: Insert the LED Strip into the Connector
Carefully insert the LED strip into the connector. For clip-on connectors, simply clip the connector onto the copper pads. For pin or push-in connectors, slide the strip into place, ensuring it fits snugly.
Step 4: Test the Connection
After you’ve attached the connector, plug in your LED strip and test the connection. The LED strip should light up without any issues. If it doesn’t, double-check the connector for a secure fit.
Pro Tips:
- Ensure the connector is inserted firmly into the copper pads, as a loose connection can cause flickering or malfunction.
- If you’re using a pin or push-in connector, make sure that the strip is aligned correctly to avoid any misfires or damage.
- Always test the connection before continuing with your installation to make sure everything works as expected.
Common Issues and Troubleshooting
While LED strip connectors make installation much easier, there are still a few common issues that you might encounter. Here’s how to troubleshoot:
LED Strip Not Lighting Up After Connection
If your LED strip isn’t lighting up, this could be due to several reasons:
- Poor Contact: The connector might not be properly aligned or inserted into the copper pads.
- Wrong Connector: If the connector is incompatible with your LED strip, it won’t work correctly.
- Damaged LED Strip: The LED strip itself may be damaged or faulty.
Solution: Double-check the connector and ensure it’s correctly inserted. Also, verify that you’re using the correct connector for your LED strip. If everything looks good and the strip still doesn’t work, it might be worth testing the strip with a different connector or replacing it entirely.
Loose or Unstable Connection
A loose or unstable connection can cause flickering or uneven lighting.
Causes: This usually happens if the connector was not inserted properly or if the connector quality is poor.
Solution: Reseat the connector carefully, making sure it’s snugly in place. If the issue persists, consider using a different type of connector or replacing a low-quality connector.
Incompatible Connectors
Sometimes, a connector might not fit properly with your LED strip.
Causes: This can happen if you use the wrong type of connector for the strip width or type (e.g., a 10mm connector for an 8mm strip).
Solution: Always check the specifications of the connector before purchasing. If in doubt, consult the manufacturer’s recommendations or contact a reputable LED strip connectors supplier for advice.
Choosing the Right LED Strip Connectors
Choosing the right connector can make a huge difference in the overall success of your project. Here are a few key factors to consider when making your decision:
Key Factors to Consider
- Compatibility: Ensure the connector matches your LED strip’s width and type (e.g., 8mm, 10mm, RGB, etc.). This is one of the most important considerations to ensure proper functionality.
- Type of Installation: Are you looking for a temporary connection or a permanent one? Depending on your needs, you might opt for clip-on connectors for quick fixes or pin connectors for more stable, long-term installations.
- Quality: The quality of connectors varies significantly between manufacturers. Choose connectors made from durable materials (like high-quality plastic or metal) for long-lasting reliability.
Where to Buy LED Strip Connectors
When looking for LED strip connectors, it’s crucial to purchase from a trusted LED strip connectors manufacturer or supplier. A reliable supplier will offer a range of high-quality connectors compatible with various LED strip types and provide detailed product specifications.
Recommended Sources:
- Online stores with customer reviews and clear product descriptions.
- Specialized LED lighting suppliers that offer expert guidance and a wide selection of connectors.
- Local electrical or hardware stores with a knowledgeable staff who can assist with compatibility and installation concerns.
Conclusion
Reconnecting your LED strips without soldering is not only possible but also simple and effective when using the right LED strip connectors. Whether you’re working on a DIY project or need to make quick adjustments to an existing setup, connectors save time, prevent damage, and make the entire process smoother.
By understanding the different types of connectors and how to use them properly, you can ensure your LED strips perform optimally, every time. Choose the right connector based on your specific needs, test the connection, and enjoy the benefits of a hassle-free installation.
If you’re in the market for high-quality LED strip connectors, look no further than a trusted LED strip connectors supplier to find exactly what you need for your next project!


