I. Introduction
LED Strip Lights have revolutionized modern illumination, offering unparalleled flexibility and aesthetic appeal for various applications, from under-cabinet lighting and cove lighting to architectural accents and mood lighting. Their versatility makes them a popular choice for both professional designers and DIY enthusiasts. However, a common question arises when planning larger installations: how do you power multiple segments of LED Strip Lights efficiently and safely from a single power source? This guide provides a comprehensive answer, walking you through the essential considerations, wiring methodologies, and step-by-step instructions to successfully connect multiple LED Strip Lights to one power supply.
Using a single power supply offers several advantages. It streamlines your setup, reduces cable clutter, and often proves more cost-effective than using individual power adapters for each strip. Moreover, it centralizes control and simplifies future maintenance. By the end of this guide, you’ll be equipped with the knowledge to calculate your power needs accurately, select the right components, and execute a flawless LED strip installation.
II. Essential Pre-Connection Considerations
Before you begin wiring, careful planning is crucial. Skipping these preliminary steps can lead to inconsistent brightness, system failures, or even safety hazards. Understanding these fundamentals ensures a successful and long-lasting LED lighting project.
A. Voltage Matching: The Golden Rule
The most critical rule when connecting LED Strip Lights is to ensure that the voltage of your LED strips perfectly matches the output voltage of your power supply. Most LED strips operate on either 12V DC (Direct Current) or 24V DC. Connecting a 12V strip to a 24V power supply will likely burn out the LEDs almost instantly, while connecting a 24V strip to a 12V power supply will result in very dim or non-functional lights. Always verify the voltage requirements printed on your LED strip or its packaging.
B. Total Wattage & Amperage Calculation
This is arguably the most vital step in sizing your power supply. You need to calculate the total power consumption of all your LED Strip Lights combined to ensure your power supply can handle the load. Exceeding the power supply’s capacity will cause it to overheat, potentially fail, or even pose a fire hazard. Information regarding wattage per foot/meter or per roll is typically provided by the LED Strip Lights manufacture or found on the product specifications from your chosen LED Strip Lights factory.
Here’s how to calculate:
- Find Individual Strip Consumption: Look for the wattage (W) or amperage (A) per meter/foot on your LED strip’s specifications. If you only have amperage, you can calculate wattage (W=V×A). For example, a 12V strip consuming 0.5A per meter means 12V×0.5A=6W per meter.
- Sum Up Total Power Needs: Multiply the consumption per unit by the total length of the LED strips you plan to connect.
Let’s illustrate with an example:
| LED Strip Segment | Length (meters) | Wattage per meter (W/m) | Total Wattage per Segment (W) |
| Strip 1 | 3 meters | 6 W/m | 18 W |
| Strip 2 | 2 meters | 6 W/m | 12 W |
| Strip 3 | 4 meters | 6 W/m | 24 W |
| Total Calculated Wattage: | 54 W |
C. Selecting the Right Power Supply
Once you have your total calculated wattage (e.g., 54W from the example above), you need to choose a power supply with a higher capacity. It’s highly recommended to add a safety buffer of 15-20% to your total calculated wattage. This prevents the power supply from constantly operating at its maximum limit, ensuring cooler operation, increased efficiency, and significantly extending its lifespan. For our 54W example, a 15% buffer adds 54W×0.15=8.1W, bringing the required power supply capacity to 54W+8.1W=62.1W. Therefore, you’d look for a power supply rated at least 65W or 70W.
Power supplies come in various forms, including enclosed, waterproof, and plug-in adapter styles. Choose one that suits your installation environment (e.g., waterproof for outdoor use) and aesthetic preferences.
D. Wiring Methods: Parallel vs. Series
When connecting multiple LED Strip Lights, the wiring method is crucial for optimal performance:
- Parallel Wiring (Recommended for LED Strips): In a parallel circuit, each LED strip receives the full voltage from the power supply. The positive (+) terminal of each strip connects to the positive output of the power supply, and the negative (-) terminal of each strip connects to the negative output. This method ensures consistent brightness across all strips and minimizes voltage drop issues. It’s the standard practice for constant voltage LED strips.
- Series Wiring (Generally Not Recommended): In a series circuit, the strips are connected end-to-end, with the positive of one connecting to the negative of the next. The voltage is divided across each strip. While common for individual LEDs, it’s generally unsuitable for flexible LED Strip Lights because it leads to significant voltage drop, resulting in progressively dimmer lights down the line. It also requires the sum of individual strip voltages to match the power supply, which is rarely the case for standard LED strips.
E. Cable Gauge (Wire Thickness)
Using the appropriate wire gauge is essential. Thinner wires (higher gauge numbers) have higher resistance, leading to voltage drop and heat generation, especially over longer distances or with higher current loads. This can cause your LED Strip Lights to dim, flicker, or even damage the wires or power supply. Refer to wire gauge charts that correlate wire thickness with maximum current capacity and length for DC applications.
III. Connection Methodologies
There are a few primary ways to connect your LED Strip Lights in parallel, each with its own advantages depending on your setup’s complexity and your comfort with electrical work.
A. Direct Parallel Connection to Power Supply
This is the most common and robust method, especially when multiple strips are located relatively close to the power supply.
- Using a Distribution Block/Terminal Block: A distribution block acts as a central hub where all your positive wires converge, and all your negative wires converge. You’ll connect the power supply’s positive output to one terminal on the block, and then each LED strip’s positive wire to another positive terminal. Repeat for the negative wires. This creates a neat, organized, and secure connection point. This is often the method used by a professional LED Strip Lights factory for custom installations.
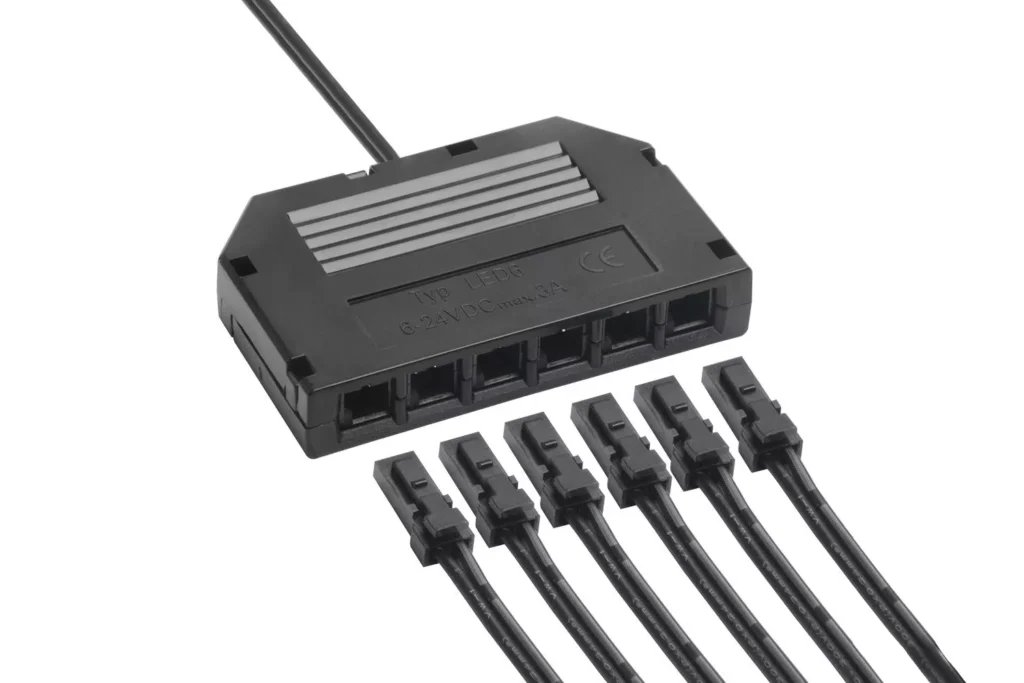
- Using a Multi-Output Splitter Cable: For simpler setups with fewer strips, pre-made DC splitter cables (e.g., 1-to-2, 1-to-4) are available. These cables have one input jack for the power supply and multiple output jacks for your LED strips. They’re plug-and-play, making installation very easy, but they limit the number of strips you can connect.
B. Daisy-Chaining (Parallel Connection between Strips)
While generally less ideal than direct connection for long runs, daisy-chaining can be practical for short, contiguous segments. In this method, you connect the positive and negative leads of one LED strip to the positive and negative input points of the next LED strip, effectively extending the circuit. While technically a parallel connection to the main power source, voltage drop can become a significant issue over long daisy-chained lengths, causing the strips further down the line to appear dimmer. It’s best used for short segments (e.g., 1-2 meters) in a series, powered from one central point where the initial power input is robust enough for the entire chain.
C. Soldering vs. Solderless Connectors
- Soldering: Soldering offers the most secure and reliable connection, minimizing voltage drop and ensuring long-term durability. It’s recommended for permanent installations, high-power LED strips, or when the connection might be exposed to movement or environmental factors. It requires a soldering iron, solder, and some basic soldering skills.
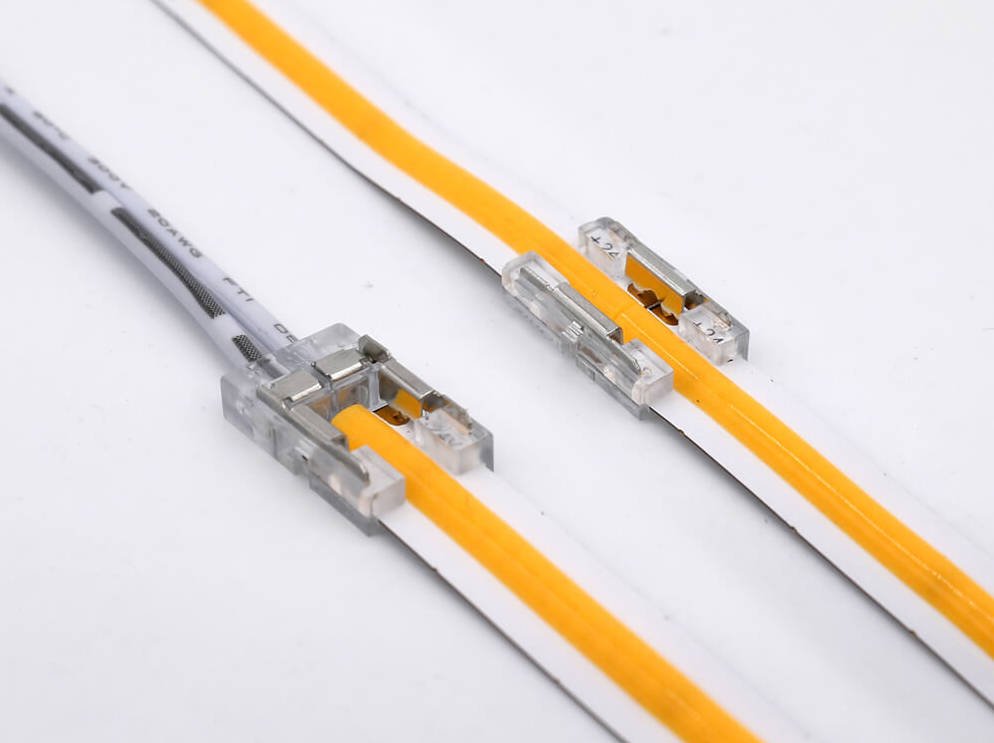
- Solderless Connectors: These are convenient for quick, tool-free installation and are popular for DIY projects. They come in various types (e.g., clip-on, quick connectors) designed to grip the LED strip’s copper pads. While easy to use, they can be less reliable than soldered connections, especially with higher currents or if not properly secured. Always choose high-quality connectors compatible with your specific LED strip width and pin configuration, as poor connections can lead to flickering or inconsistent light.
IV. Step-by-Step Connection Guide
Here’s a general guide for connecting your LED Strip Lights. Always remember to prioritize safety.
A. Gather Your Materials
Ensure you have:
- LED Strip Lights (verified voltage and total length)
- Appropriately sized DC Power Supply (with buffer)
- Wire strippers
- Connecting wires (appropriate gauge)
- Soldering iron and solder / Solderless connectors / Distribution block or splitter cable
- Heat shrink tubing or electrical tape for insulation
- Multimeter (optional, but highly recommended for testing)
- Mounting clips or adhesive for securing strips
B. Calculate and Verify
Double-check your total wattage calculation and ensure your power supply has sufficient capacity (including the 15-20% buffer). Verify that the LED strip voltage matches the power supply voltage.
C. Prepare Your LED Strips
- Cut to Length: If necessary, cut your LED strips at the designated cutting marks (usually indicated by copper pads and a scissor icon).
- Prepare Connections:
- For Soldering: Gently strip a small portion of the insulation from your connecting wires. Tin the exposed wire ends and the copper pads on the LED strip. Solder the wires to the corresponding positive (+) and negative (-) pads.
- For Solderless Connectors: Open the connector clip, align the LED strip’s copper pads with the connector’s pins, and firmly close the clip. Ensure a secure connection.
D. Wire the Connection
For Direct Parallel Connection (Recommended):
- Connect the positive (+) output wire from your power supply to the positive input terminal of your distribution block.
- Connect the negative (-) output wire from your power supply to the negative input terminal of your distribution block.
- For each LED strip: Connect its positive (+) wire to an available positive terminal on the distribution block.
- For each LED strip: Connect its negative (-) wire to an available negative terminal on the distribution block.
- If using a splitter cable, simply plug the power supply into the input jack and each LED strip into an output jack.
E. Secure and Insulate
Once all connections are made, inspect them carefully. Use heat shrink tubing or high-quality electrical tape to insulate all exposed wire connections. This prevents short circuits and ensures long-term safety and reliability. For solderless connectors, ensure they are securely closed and protected from strain.
F. Test Your Setup
Before mounting everything permanently, plug in your power supply and test your LED Strip Lights. Check that all segments light up uniformly and brightly. If there are issues, proceed to the troubleshooting section before making permanent installations.
V. Common Challenges and Troubleshooting
Even with careful planning, issues can arise. Here’s how to diagnose and fix common problems:
A. Voltage Drop (Dimming at the End of the Strip)
Problem: Your LED Strip Lights are bright at the beginning but become progressively dimmer towards the end of a long run, especially with a single power injection point. This is a common issue with flexible LED lighting.
Solution:
- Power Injection: For long runs (typically over 5 meters for 12V strips or 10 meters for 24V strips), you’ll need to “inject” power at multiple points along the strip. Run separate positive and negative wires from your power supply (or distribution block) to the middle or end of the long strip, creating a parallel connection to that point as well.
- Thicker Wires: Use a larger gauge (thicker) wire for longer runs to reduce resistance.
- 24V Strips: Consider using 24V LED strips for longer runs, as they experience less voltage drop than 12V strips over the same distance with the same power output.
B. Flickering or No Light
Problem: The lights flicker, or some strips don’t light up at all.
Solution:
- Overloaded Power Supply: If the power supply is undersized for the total wattage, it might flicker or shut down. Re-calculate your power needs and upgrade the power supply if necessary.
- Loose Connections: Check all wiring connections, especially solderless connectors, for looseness. Wiggle the wires gently to see if the light flickers.
- Incorrect Polarity: Ensure all positive (+) wires are connected to positive terminals and negative (-) wires to negative terminals. Reversed polarity will prevent the LEDs from lighting up.
- Damaged Strip Segment: If only a portion of a strip is out, that segment might be damaged.
C. Overheated Components
Problem: Your power supply or wires are hot to the touch.
Solution:
- Undersized Power Supply: This is the most common cause. Ensure your power supply has that 15-20% buffer.
- Poor Ventilation: Ensure your power supply has adequate airflow around it. Don’t enclose it in tight spaces without ventilation.
- Incorrect Wire Gauge: Wires that are too thin for the current load will heat up. Upgrade to a thicker gauge.
VI. Safety Precautions
Working with electricity always requires caution. Adhering to these safety measures is paramount:
- Always Disconnect Power: Before making any connections or adjustments, always unplug the power supply from the wall outlet.
- Proper Insulation: Ensure all exposed wires and connections are properly insulated with electrical tape or heat shrink tubing to prevent short circuits.
- Ventilation for Power Supply: Allow ample space around your power supply for proper heat dissipation. Overheating can lead to malfunction or fire.
- Overload Protection: Consider using power supplies with built-in overload protection, or adding inline fuses for critical circuits, especially for larger installations.
- Waterproofing: For outdoor or damp applications, use only IP-rated (Ingress Protection) waterproof LED Strip Lights, power supplies, and connectors. Do not use indoor components outdoors.
- Consult a Professional: If you’re unsure about any step or dealing with complex installations, always consult a qualified electrician. Your LED Strip Lights factory or LED Strip Lights manufacture may also offer specific installation guidelines.
VII. Conclusion
Connecting multiple LED Strip Lights to a single power supply is a straightforward process once you understand the core principles of voltage matching, power calculation, and parallel wiring. By carefully planning your setup, selecting appropriately sized components, and following the correct connection methodologies, you can create a seamless and brilliantly lit environment. Whether you’re enhancing your home with ambient flexible LED lighting or undertaking a commercial project, these guidelines will help you achieve a safe, efficient, and aesthetically pleasing LED lighting solution. Now, go forth and illuminate your space with confidence!